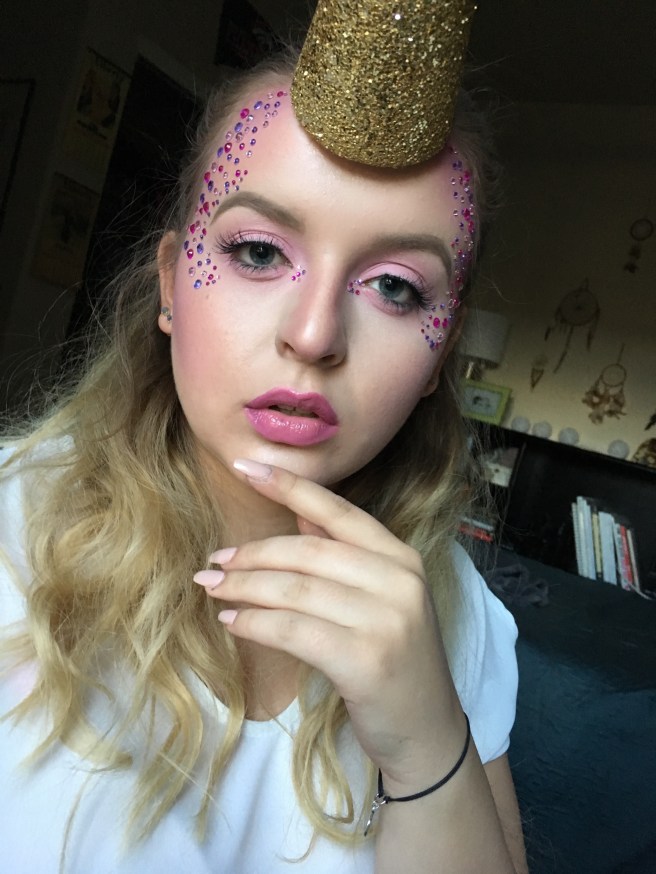
Hello loves! Todays look was definitely inspired by all those crazy talented artists on instagram. I knew I wanted to do some softer more feminine looks for those of you out there who don’t want to look like half of your face is missing. Heres my soft glam unicorn look!
products used:
becca backlight priming filter
loreal pro glow foundation – 202
cover fx custom enhancer drops – moonlight
urban decay naked skin concealer – fair
mac pro shaping powder – emphasize
anastasia beverly hills dipbrow pomade – taupe
mac gigiblack mascara
ardell lashes – wispies
duo brush on lash glue
morphe eyeshadow palette – 35N
colourpop lip line3r – flawless
colourpop lippie stix – westie
clinique gloss – girls night out
michaels rhinestones
liquid latex
gold paint
gold glitter
styrofoam cone
bobby pins
step 1: prime – I applied becca backlight priming filter for a base glow.
step 2: foundation – I mixed loreal pro glow foundation and cover fx moonlight for a really glowy shinning foundation look.
step 3: concealer – I concealed my under eyes, eyelids, chin, cupids bow, bridge of nose, and center of forehead with UD naked concealer.
step 4: powder – I set my under eyes with mac emphasize to maintain the light glow.

step 5: brows – I filled in my brows with abh taupe dipbrow.
step 6: shadow – I used the pink from the morphe 35n all over my eyes. I used the same shade around the perimeter of my face.
step 7: mascara – mac gigiblack mascara is my go to for darkening my lashes before falsies because it still looks natural enough to blend with lashes.
step 8: false lashes – I used ardell wispies. I like the duo brush on lash glue because it is so easy to apply it evenly on the lash band without a mess. I let it dry for about 30 seconds before actually putting them on my eyes so that they are tacky enough. I press them against my real lashes with tweezers so that you can’t see a distinction line.
step 9: lips – I lined my lips using colourpop flawless liner and filled them in with colourpop westie stick. I topped it all off with clinique GNO gloss.
step 10: rhinestones – I used sets of rhinestones from the scrapbooking section at michaels to create a halo around my eyes. I used individual rhinestones and applied them with tweezers and lash glue. If you don’t have the patience for that then I would look for a patterned set of rhinestones so you don’t have to do all the placement yourself.
step 11: horn – I used a styrofoam cone from michaels and painted it gold and applied gold glitter while the paint was wet. If I were to do it again, I would cut the horn to be much smaller. I used some liquid latex on my forehead to help adhere the horn to my forehead but it wouldn’t exactly stay so I ended up bobby pinning it to my head from the back by just poking through the foam which was much more effective.
heres the completed look again:


I am providing pictures of some of the products so that you can find similar products and colors in your own collections! These are just the products I use but you can substitute in anything really and still look fierce. If any of you recreate these looks please tag me in them so I can see all your beautiful faces!! Ill be back tomorrow with another halloween look. Don’t forget to check back!
love & lipstick kisses💋

Reblogged this on mherrera1.
LikeLike